That's looking great! Better job than I did!
Having 4WD means getting stuck in more inaccessible places!

Tapatalk is active for this site! Just go to your phone's store to download and install.
|
Not registered as a member yet?
|
|
|||
| Okay I get it you're not sure if we measure up yet. No problem look around and we think you'll find some good info and a lot of good people here all willing to help and not flame you when you ask a question. | ||||
 |

 Level: Uber Jeep Cherokee Trailer Queen


That's looking great! Better job than I did!
Having 4WD means getting stuck in more inaccessible places!
Having 4WD just means getting stuck in more inaccesible places
http://www.xjtalk.com/showthread.php?t=9215
http://www.xjtalk.com/showthread.php...659#post203659
http://xjtalk.com/showthread.php?t=19085
 Super Moderator
Great work as usual
230 hp 4.3L Chevy
Built 4L60E with manual lockout
Atlas 4 speed
Griffin radiator
On board air
Warn 9.5ti on custom bumper
7.5" RE front and bastard pack rear on custom long arms
30 gal gas tank
lockers
And a bunch of other stuff
 Super Moderator
That's looking pretty awesome... I was going to say as you build them, you should make sure their sealed... and now you have to tanks for OBA.. My uncle built front and rear bumpers for his old Nissan pickup, that were sealed and he used his as air tanks... He didn't have a compressor and such on the vehicle, he just filled the tanks up @ a gas station.. but figure shouldn't be too much harder to run lines and such to do an OBA air setup.. One day I'd love to take on this project.. but got much learning to do before I even attempt that..
FORMER GREEN XJ CLUB MEMBERIF YOU DON'T STAND BEHIND OUR TROOPS, FEEL FREE TO STAND IN FRONT OF THEM!!
DOING SOMETHING JUST BECAUSE YOUR BUDDY DOES IT THAT WAY MAKES AS MUCH SENSE AS SHARING TOOTHBRUSHES
 Super Moderator
Thanks guys! It's going well, but still a ways to go.
James, I've always hated the idea of trying to fit a tank inside, underneath, etc but this solves that nicely. Even if I won't have them plumbed for a few years it's not like it's gonna be easy later on to redo do it.
Sent via messenger pigeon. I talk, he types.
Super Moderator
Not sure why people take their jeeps to the beach... when you can bring the beach to it!
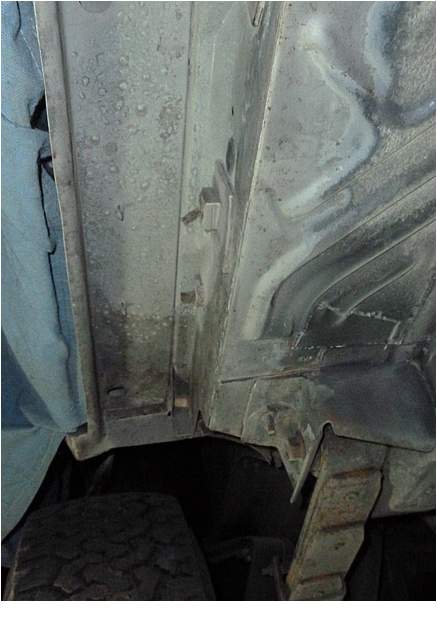
Gave the new blaster a good shakedown with about 100lbs of filtered play sand. Not really done because I want to clean all the way to the frame, but this is taking for ever so i'm putting it off till later. For now I cleaned it where the angle will go and the inner rocker. Some weld thru primer as well.
Super Moderator
Finally got time to post all this...
Thursday, I didn't have time to do any work but I did some quick research and picked up some fittings to try my hand at building an air tank.
Friday/Saturday, I cut out some spare 1/4" into pieces to cap the ends.
I didn't want just a straight side the whole way so I decided to do things my way... complicated. I sliced a 3/8" pie cut out of the front and bent the outside inward.
Here you can see it come together with a little persuasion.
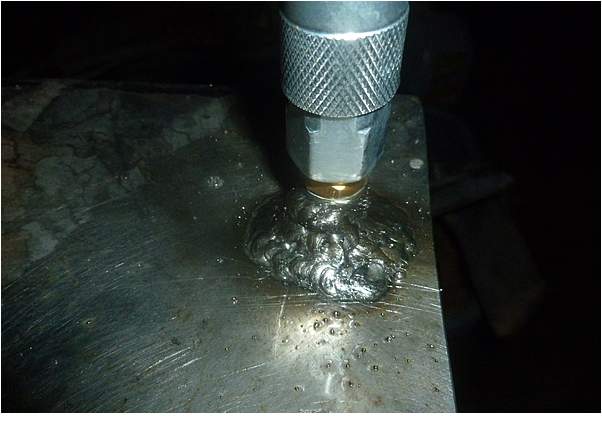
Some of those pieces I got. I tried finding an actual bung but to no avail I figured i'd give a steel female air line fitting a try... with modifications. I cut the notched end off and ground down the head round.
A cozy home for it right in the top front of the tube. There's not many spots on this one that aren't gonna get covered or be in danger of a rock to come knocking. So things are gonna be tight.

Last edited by XJ Wheeler; 03-22-2016 at 05:05 AM.
Super Moderator
I cut a heavy bevel in the end caps so I could fill it with weld. Since I was now trying to seal the tubing I thought two passes was a good idea, so that's what I did.
First pass...
Second pass...
Here's the pie cut noted in the last post.
And sadly, the fitting weld didn't go well. I made 2-3 passes around it and tested it but leaked like a sieve. So a couple hours later I had built an ant hill chasing leaks, but finally holding pressure! My compressor has a 125psi shut off so I could only get it at about 115 but held over night. And those two passes on the ends had not one leak.
Super Moderator
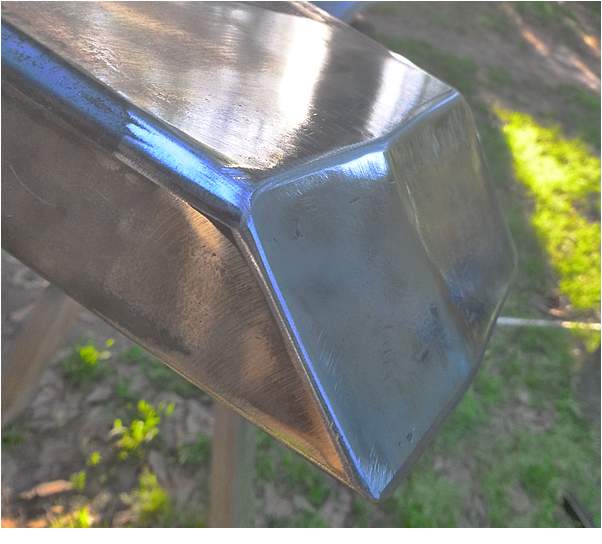
The ends ground smooth.
Super Moderator
(Sorry about all the posts. Its just a lot easier to upload all the pics this way.)
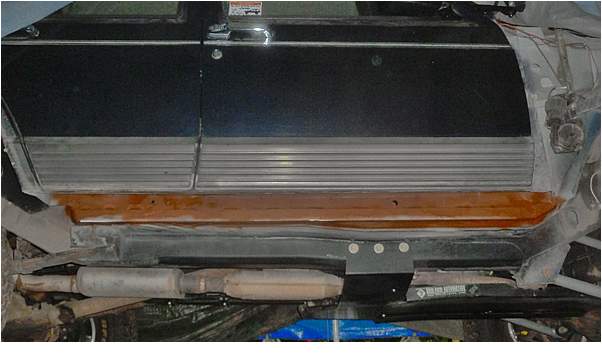
Here it is hoisted in place.
And you can see how the pie cut lines up.

Super Moderator
Sunday...
Since one air line point isn't enough and I copied what I did in the front, except on the inside of the rear. That was the ONLY other place to fit even one and thankfully two fit, albeit they're in close quarters. And to up the tightness level the body angles toward the rear so they needed to mimic that angle. The front is for the outlet, rear top for in, and bottom rear for a 150psi relief valve/bleeder.
More stuff growing out of control. Holds 125 over night though!
Its soon-to-be home. You can see the cramped accommodations.
I am trying to come up with a way to protect them from debris, as well as still being accessible.
Super Moderator
Monday...
I got the bottom fender mount done with a cup bolt tacked to the top of the tubing and a hole drilled in the fender. Pic later.
And the angle is now attached to the corner of the floor. I was able to stitch it on the top but sadly the bottom was having none of it. I had to switch to tacks.
A bit of primer.
Last edited by XJ Wheeler; 03-22-2016 at 05:07 AM.
Level: Uber Jeep Cherokee Trailer Queen
Wow! You are going all out! Looks great!
Having 4WD means getting stuck in more inaccessible places!
Having 4WD just means getting stuck in more inaccesible places
http://www.xjtalk.com/showthread.php?t=9215
http://www.xjtalk.com/showthread.php...659#post203659
http://xjtalk.com/showthread.php?t=19085
 Level: Uber Jeep Cherokee Trailer Queen
Damn, that is looking great Jake! Getting those small diameter fittings and tubes completely burned in without any leaks is tough! I've been practicing this myself just for fun and it still can be pretty hit or miss for me.
Super Moderator
Looking very nice Jake. Nice and neat
230 hp 4.3L Chevy
Built 4L60E with manual lockout
Atlas 4 speed
Griffin radiator
On board air
Warn 9.5ti on custom bumper
7.5" RE front and bastard pack rear on custom long arms
30 gal gas tank
lockers
And a bunch of other stuff
 Level: Uber Jeep Cherokee Trailer Queen
Well done bro, never seen like one before
Sent from my GT-S7582 using Tapatalk
'91 XJ Limited | 4.0 H.O. I6 | AW-4 | NP242J | D30 | C8.25 | BFG KM2 33x10.50x15 | front winch bumper ...
 Posting Permissions

 Reply With Quote

Bookmarks