 How to change rear wheel bearings
Had to change the left rear wheel bearing on the XJ today. It has about 300K on it and has been driving me nuts  with noise.
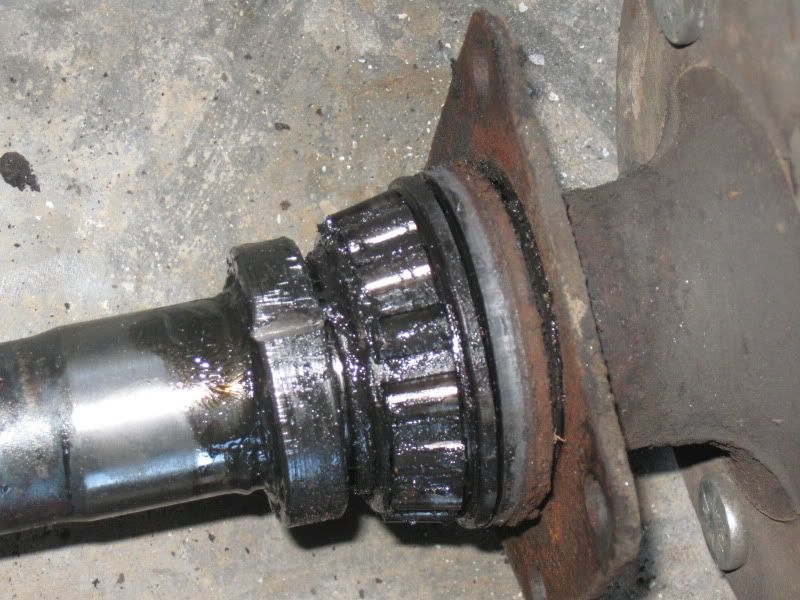
My 86 XJ came with the infamous Dana 35, however one plus is that I have non C clip axles. The plate on the outside of the axle bearing holds the bearing in and thus the axle.
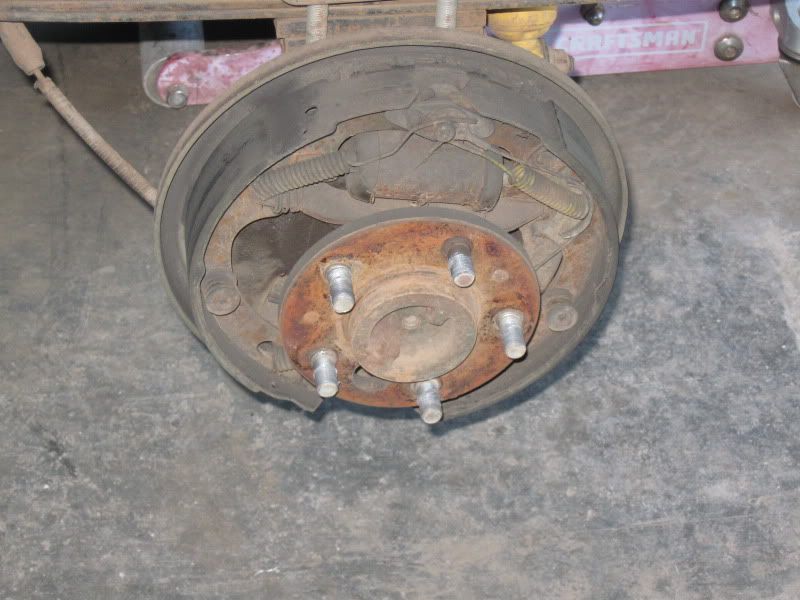
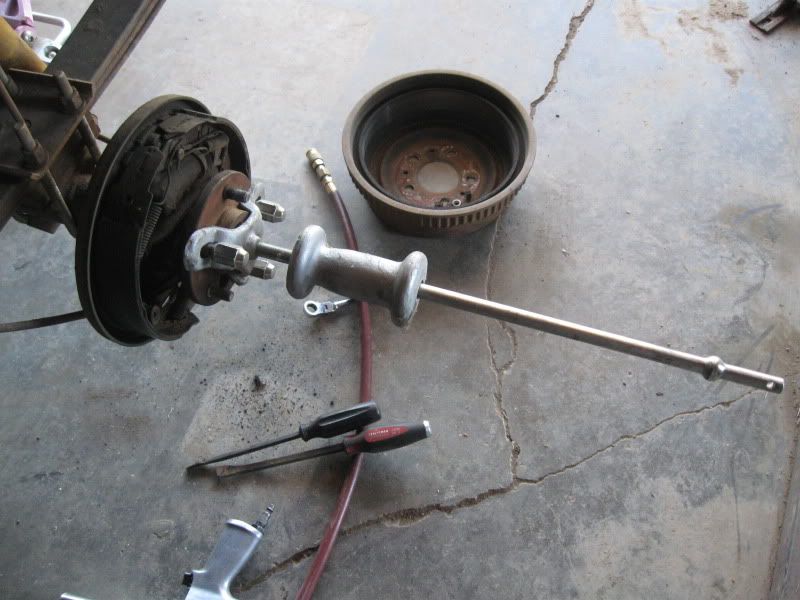
To start, jack up the rear, remove the wheel and brake drum. It should just slide off.
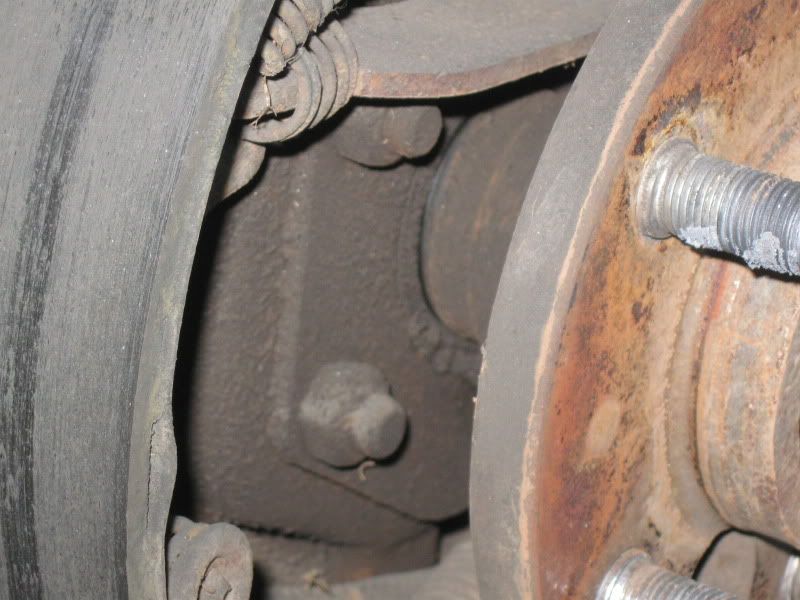
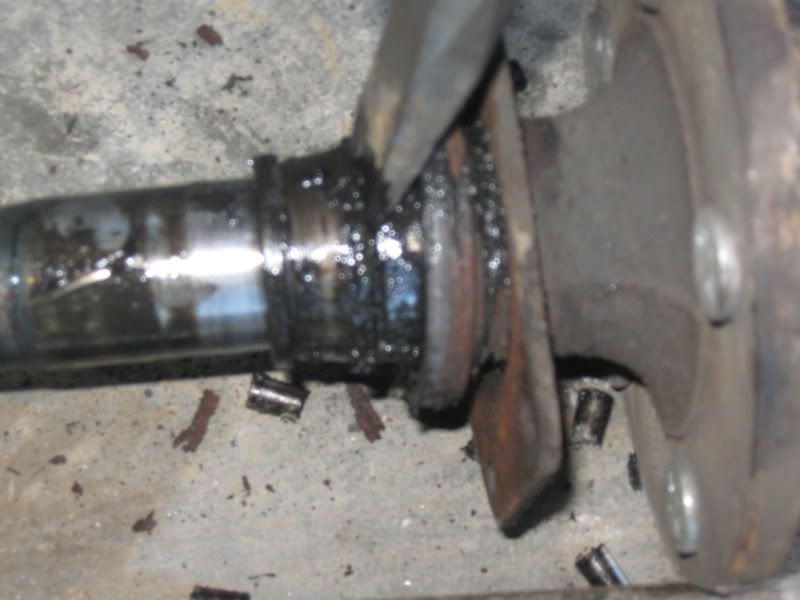
Next, there is a small plate with four bolts on it that holds the axle in. These must be removed next. It is not necessary to remove any part of the brake assembly.
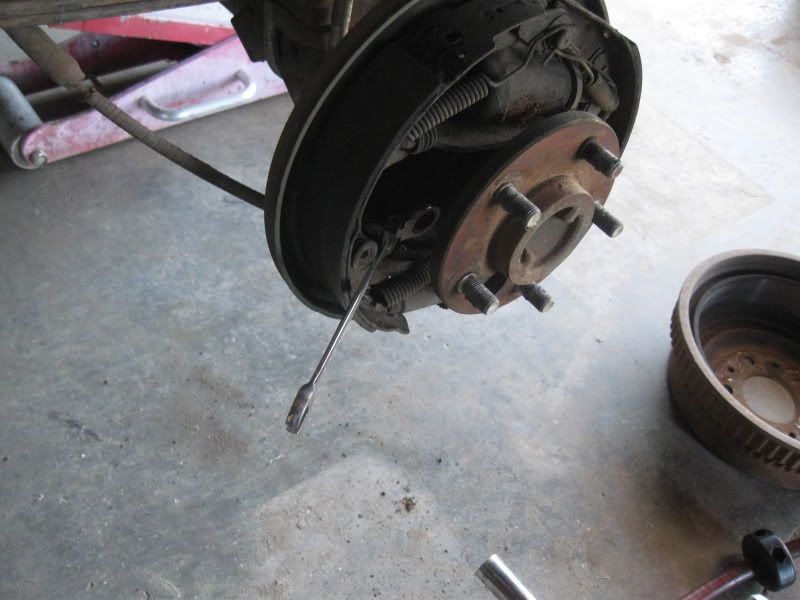
If you have ever wanted an excuse to get one of those flexible ratchet wrenches, this is the time
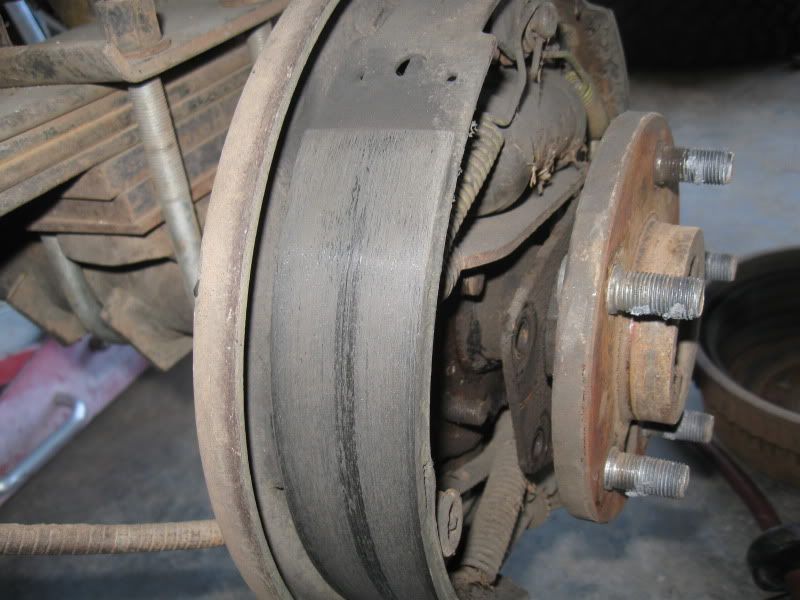
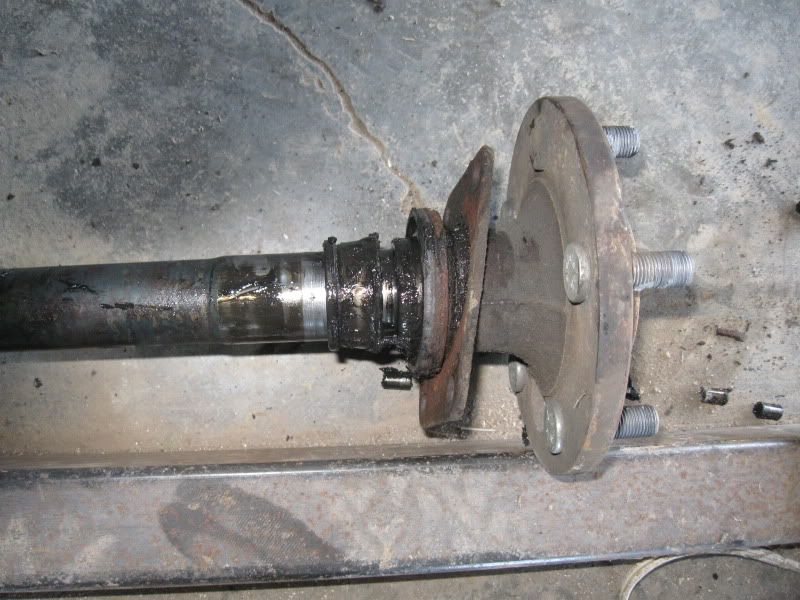
The plate should slide freely off the studs like this.
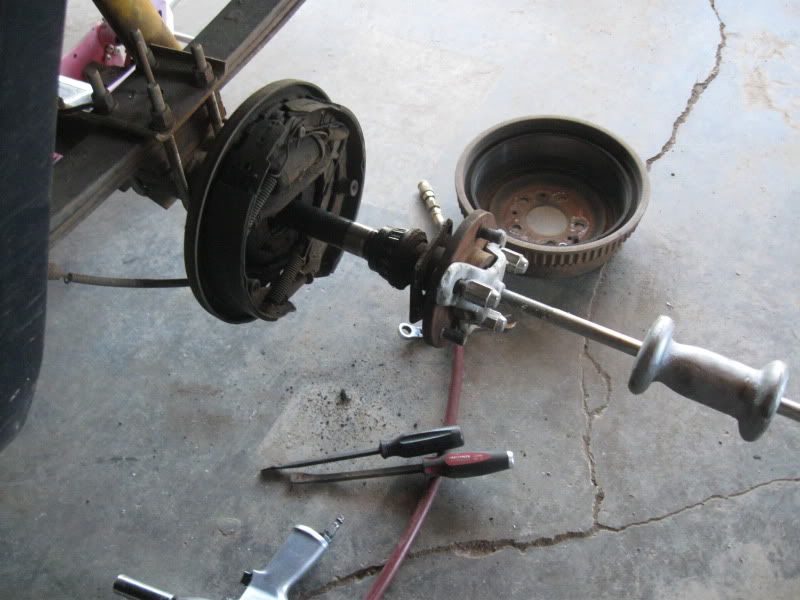
Next, the axle should be able to be removed. However if you have C clip axles, you will have to remove the differential cover and rotate the carrier to the appropriate position and remove the C clip first. To remove the axle, you will need a slide hammer. These can be rented or borrowed from many parts stores.
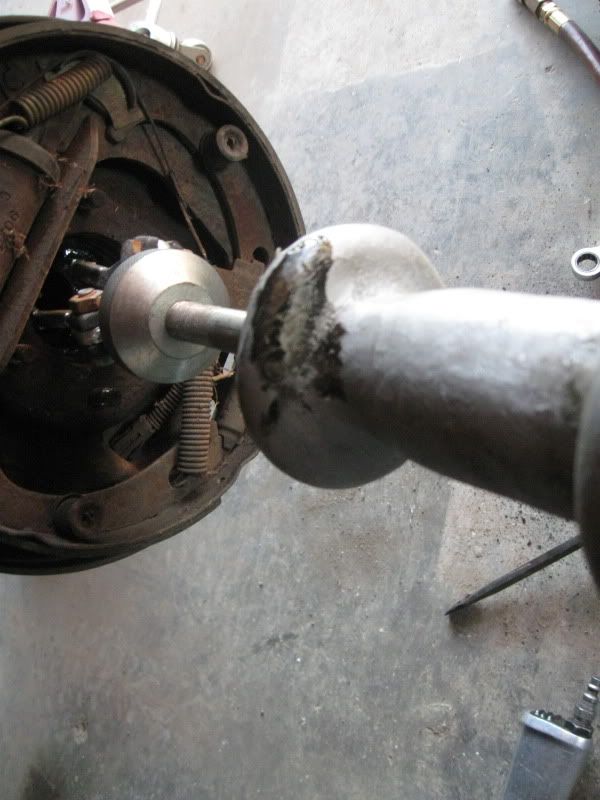
Since the wheel bearing was shot, the outer race stayed in the axle housing. But not to worry, slide hammer kits have a small gear puller that attaches to the end. Use the reverse jaws. It will remove easily.
Next you will have to remove the bearing from the axle. It has two pieces, the inner bearing race and a safety ring. To remove the safety ring, get the big effin hammer out and a good sharp cold chisel. Drive the point of the chisel into the safety ring. It is soft and doing so will make it slightly larger.
This is about how far you have to drive the chisel in. This ring almost came off in my hand. If still secure, use the chisel to drive it off.
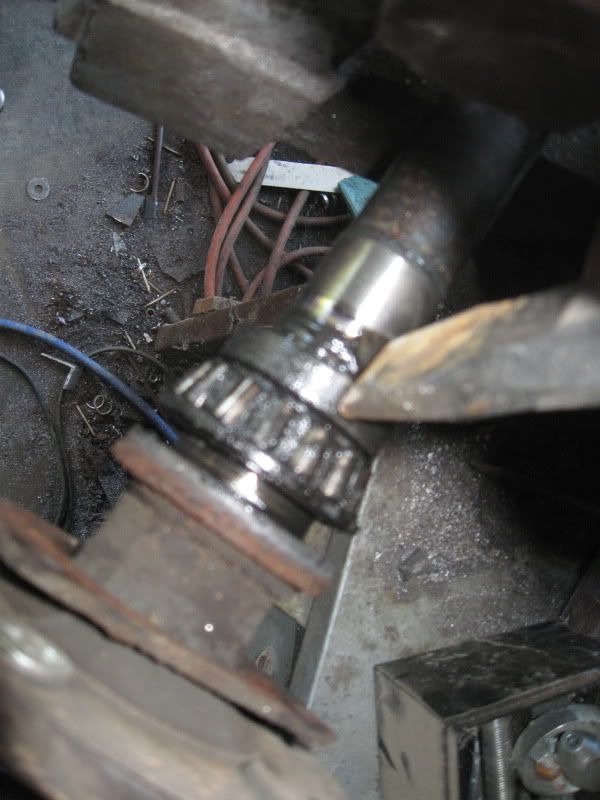
Next, you have to remove the inner race. It is much harder than the chisel, so you will have to drive it off using the chisel like this. If you look closely, you will see that the race has already moved about 1/16". BE CREFUL NOT TO TRY TO MOVE THE INNER RACE BY DRIVING THE CHISEL BETWEEN THE AXLE AND RACE. This will damage the seal surface and then you will get to buy a new axle. Make sure the chisel only touches the bearing race.
Here the race is moved a little more. You must make sure the chisel does not touch the shaft here also. Scoring the axle will make it difficult to press the new bearing on.
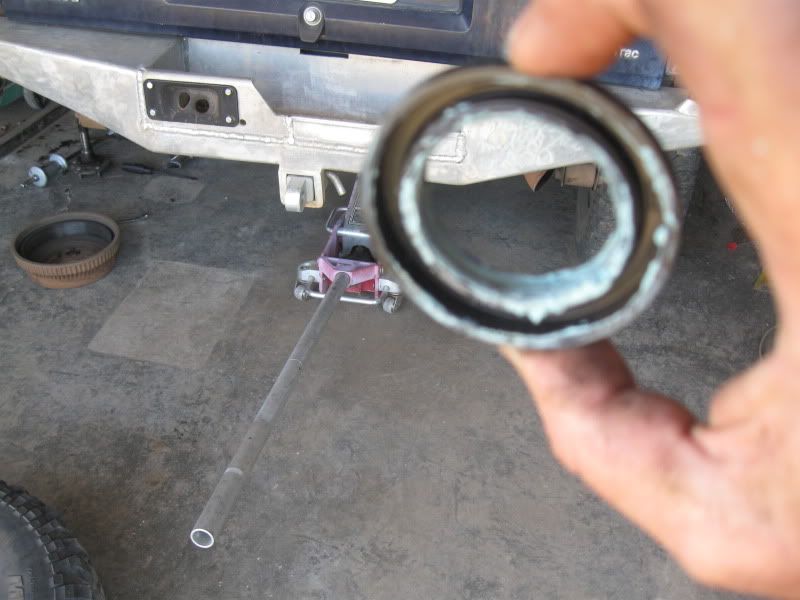
The first thing to go back on is the new seal. Make sure the little retainer plate is still on the axle. The seal has an inner and outer lip. It is made to seal both ways. Fill the inner area with grease so it will always remain lubricated. This is the only grease that will be in this area
[ame]http://www.youtube.com/watch?v=97LGtsVH87s[/ame]
Next, you must pack the new bearing with grease. It only comes with enough lubricant to assemble and keep it from corroding. Click on the video to see how to do it.
Next the bearing needs to be pressed on. I could do it in my press, but setting it up was not worth the trouble. Grind the end of the cold chisel flat and place it on the inner race and hit it with the hammer. Alternate sides and it will go on easily.

Repeat the procedure with the safety ring.
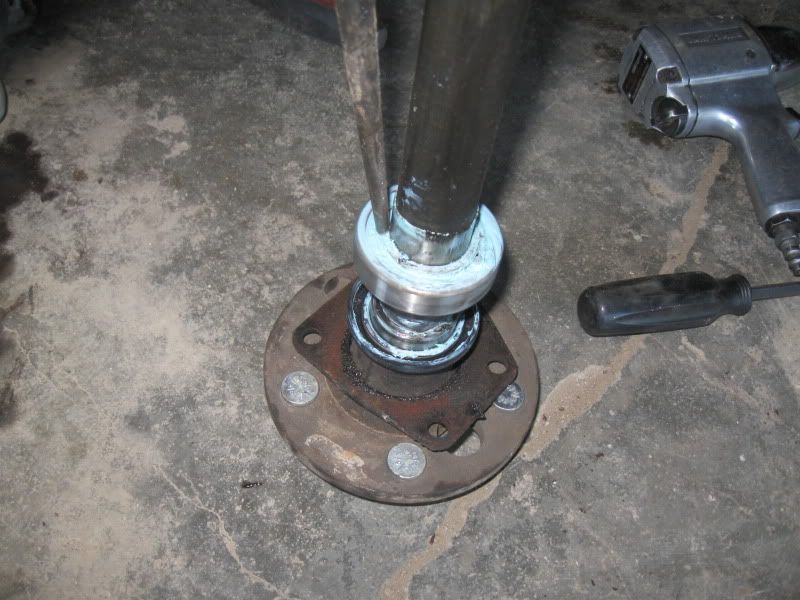
Now you are ready to put it back in the axel tube. When it gets to the carrier it will stop. Just push down a little on the axle shaft and rotate slightly and it will find its way into the spider gears. Reattach the slide hammer and use the slider to knock the new bearing in. It needs to be snug. At this point, you need to insert the C clip if you have one and bolt the cover on and fill with new oil.
The bearing will be in place, but the seal will not. This might look daunting, but it is not. Put the retainer plate in place, put all four nuts back on and slowly and evenly tighten them. This will press the seal in place. Make sure the nuts are all the way tightened down. It is the retainer plate pushing on the outer ring of the seal which pushes on the outer bearing race which keeps the axle in place.
Put the wheel back on, torquing the lug nuts down to 75# and you are done.
Last edited by 4.3LXJ; 08-14-2011 at 12:33 AM.
230 hp 4.3L Chevy
Built 4L60E with manual lockout
Atlas 4 speed
Griffin radiator
On board air
Warn 9.5ti on custom bumper
7.5" RE front and bastard pack rear on custom long arms
30 gal gas tank
lockers
And a bunch of other stuff


 Reply With Quote
Bookmarks